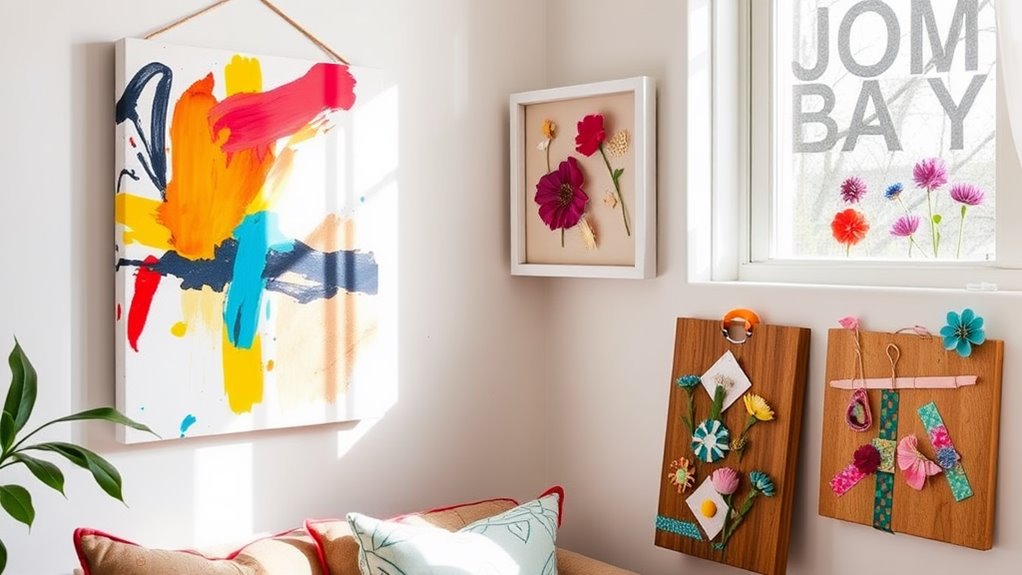
If you're looking for beginner-friendly DIY wall art ideas, you're in for a fun treat! I love creating simple dried floral frame art or painting serene monochromatic watercolor landscapes that bring a touch of nature indoors. You can also explore easy oil pastel drawings or fabric decoupage on canvas for a personal flair. Plus, using thrifted materials opens up endless creative possibilities! Wouldn't it be exciting to make something unique for your space? You'll discover more inspiration ahead!
Design Highlights
- Create dried floral frame art using meaningful blooms to personalize your wall decor while preserving nature's beauty.
- Experiment with monochromatic watercolor landscapes for a calming effect, using various shades of a single color for depth.
- Use oil pastels on canvas or paper for vibrant, abstract art; blending with fingers yields smooth transitions for a lively atmosphere.
- Try fabric decoupage on canvas to showcase unique patterns and textures, layering materials for a visually engaging piece.
- Transform thrifted materials like vintage frames or salvaged windows into creative wall art, adding character and charm to your home.
Simple Dried Floral Frame Art
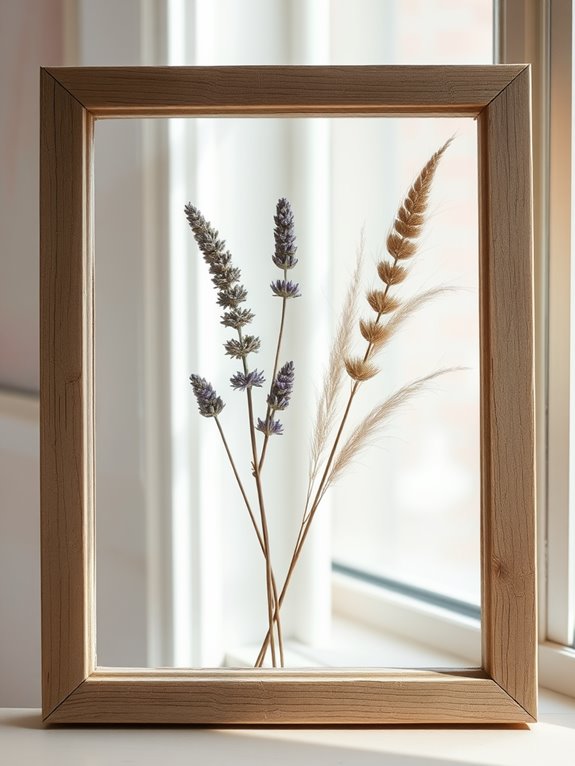
Creating simple dried floral frame art is a delightful way to bring a touch of nature into our homes, especially when we want to celebrate the beauty of flowers in a unique way. This simple project allows us to preserve fresh blooms using methods like microwaving or traditional pressing. By choosing a decorative frame that complements our home decor, we can enhance our DIY wall art piece beautifully. Not only does this type of art reflect our personal style, but it also becomes a focal point in our space, making our walls come alive with stunning wall decor ideas. In addition, dried floral art adds an organic element to the decor, enhancing the overall aesthetic of our home with natural decor elements. Incorporating unique design elements can further elevate the appeal of our wall decor. Furthermore, using eco-friendly materials in our projects can ensure that we create sustainable art pieces that also contribute to a healthier environment.
Adding dried florals to our decor is not only visually pleasing but also aligns with current design trends that emphasize nature-inspired elements in interior spaces.
Once the flowers are dried, I arrange them attractively inside the frame, securing the backing to keep everything in place. Not only is this a budget-friendly DIY, but it also lets us personalize our piece of art with flowers that hold special meaning. It adds elegance and tranquility to our living spaces—don't you just love that?
Monochromatic Watercolor Landscapes
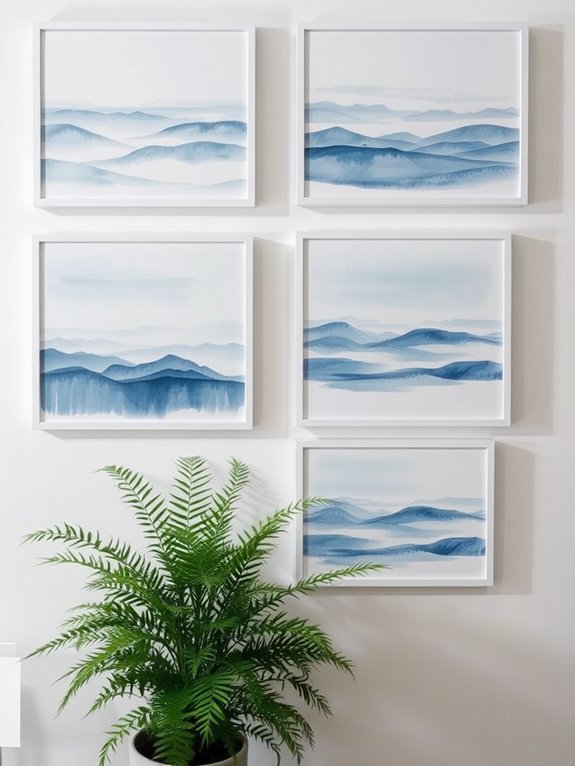
Creating a monochromatic watercolor landscape can be a wonderfully rewarding experience, and I'm excited to share how to get started!
You'll need just a few materials, and I'll walk you through a simple step-by-step process that'll make your art shine. Consider adding elements of nature-inspired designs to further enhance your artwork's appeal, such as incorporating botanical prints for a calming atmosphere.
Plus, I'll share some personalization tips and techniques to help you infuse your unique style into each piece—let's get those creative juices flowing! Additionally, incorporating stunning wall decor into your space can elevate the overall aesthetic of your artwork.
Materials Needed Overview
When it comes to crafting stunning monochromatic watercolor landscapes, having the right materials makes all the difference.
First, you'll need quality watercolor paper, which provides the perfect canvas for your artistry. Next, grab a set of watercolors in varying shades of a single color; this will help you create depth and interest in your landscape. Additionally, selecting stunning wall decor products can inspire your color choices and overall theme. Choosing the right wall decor style can also influence the mood of your artwork. To enhance your project further, consider incorporating coastal-themed decor elements that evoke a breezy atmosphere. Incorporating unique wall art options can elevate your design and further personalize your space.
Don't forget paintbrushes in different sizes for those detailed touches! A pencil is handy for lightly sketching your composition; it gives you a guide before the paint flows.
Having clean water nearby is essential for rinsing brushes and controlling paint intensity. If you want, use masking tape to secure your paper and avoid warping. Additionally, incorporating stunning wall decor can enhance the aesthetic appeal of your finished artwork.
With these materials, you're ready to release your creativity!
Step-by-Step Process
With your materials all set, let's jump into the exciting process of crafting your monochromatic watercolor landscape.
First, lightly sketch a simple abstract painting outline on your watercolor paper. This will guide your brushwork. Creating a design that reflects your personal style can make your art even more meaningful. Consider adding a touch of vintage warmth to your painting for a charming effect, similar to the Daffodil Floral Bouquet Metal Tin Sign. You might also find inspiration in fall-themed unframed prints, which celebrate the beauty of seasonal changes. Incorporating elements of warm-colored wall art can enhance the seasonal charm of your design.
Next, wet the area where you'll paint, allowing for a smooth blend. Layer your chosen color in varying intensities to add depth.
Don't forget the dry brush technique to create texture or apply more water for softer gradients. This step-by-step tutorial makes it easy and fun! Additionally, consider incorporating elements of rustic charm to enhance the overall aesthetic of your art.
Once it's dry, you can frame your masterpiece or leave it as minimalist wall decor. Hang it in a well-lit area to truly highlight those beautiful watercolor effects.
Enjoy your new DIY wall art ideas!
Personalization Tips and Techniques
Personalizing your monochromatic watercolor landscape can turn a simple piece of art into a true reflection of your style and feelings. Here are some tips to help you create unique pieces that resonate with you:
- Choose a color that speaks to your emotions.
- Experiment with different shades to add depth.
- Incorporate familiar land features like hills or trees.
- Try wet-on-wet techniques for soft edges, or wet-on-dry for sharp details.
- Use a round brush for broader strokes and a fine brush for intricate details.
Incorporating seasonal touches through elements like snowflakes can enhance your artwork and reflect the beauty of winter.
Easy Oil Pastel Drawings

Diving into the world of oil pastels can be a delightful adventure, especially if you're enthusiastic to release your creativity.
These easy DIY art projects are perfect for beginners like me! I love how versatile oil pastels are; I can apply them directly to canvas, paper, or cardstock. Additionally, selecting decor pieces that match room dimensions can enhance the overall aesthetic of my workspace and complement the artwork. Incorporating vibrant colors into my designs brings a lively atmosphere to my creations.
The vibrant colors make my abstract art pop, and blending is a breeze. Just using my fingers or a blending tool, I can create smooth transitions that bring my creations to life.
Plus, they dry quickly, so I can jump from one project to another without the hassle of messy cleanup. Additionally, using stunning wall decor can elevate your artwork and create a cohesive look in your space.
Why not grab some oil pastels and let your imagination run wild? Your next masterpiece awaits!
Fabric Decoupage on Canvas
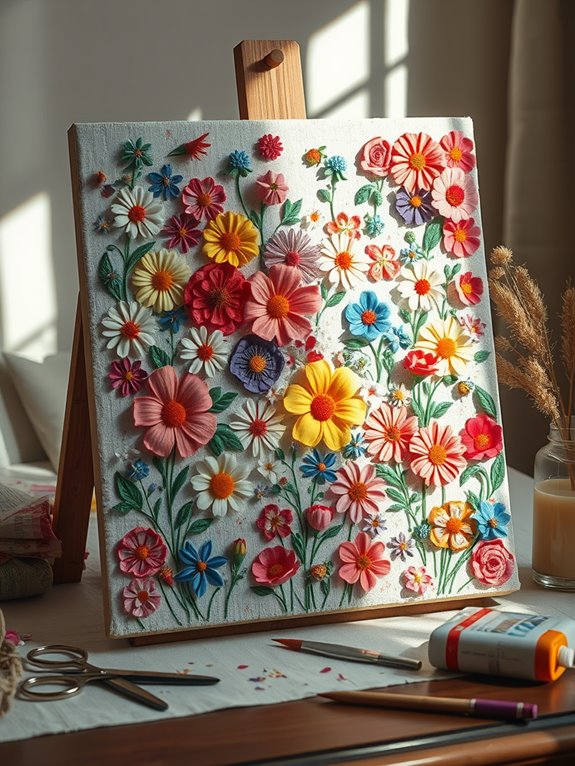
I love the idea of using fabric decoupage on canvas to create unique art pieces that truly reflect my style! Choosing the right fabric patterns can spark so much creativity, and experimenting with different application techniques makes the process even more exciting. Did you know that adding stylish wall decor can elevate the overall aesthetic of your space? Incorporating high-quality materials in your projects can significantly enhance the durability and visual appeal of your artwork. Have you ever thought about how a simple piece of fabric can transform a blank canvas into a stunning work of art? Additionally, incorporating coastal-themed decor can enhance your summer aesthetic and inspire new design ideas.
Choosing Fabric Patterns
When you start choosing fabric patterns for your decoupage project, it's exciting to think about how different colors and textures can transform a simple canvas into a stunning piece of art.
To bring your artistic vision to life, consider these tips:
- Go for contrasting colors to create visual interest.
- Mix various textures for depth.
- Cut fabric into shapes or strips for cohesive designs.
- Experiment with layering to achieve a unique, textured effect.
- Seal your creation with decoupage medium for durability.
Decoupage Application Techniques
Creating stunning fabric decoupage wall art on canvas can be a fun and fulfilling project that breathes new life into your space.
To start, I cut my fabric into shapes I love, then apply a layer of decoupage medium on the canvas surface. Placing the fabric down, I smooth out any wrinkles to guarantee a flawless finish.
After positioning, I add more decoupage medium over the top, sealing it all in place. I let each coat dry thoroughly for the best results.
The beauty of fabric decoupage is how it allows me to experiment with different textures and colors, creating unique wall art that reflects my style.
Finally, a protective clear spray sealant keeps my personalized home decor looking fresh for years!
DIY Floating Frames
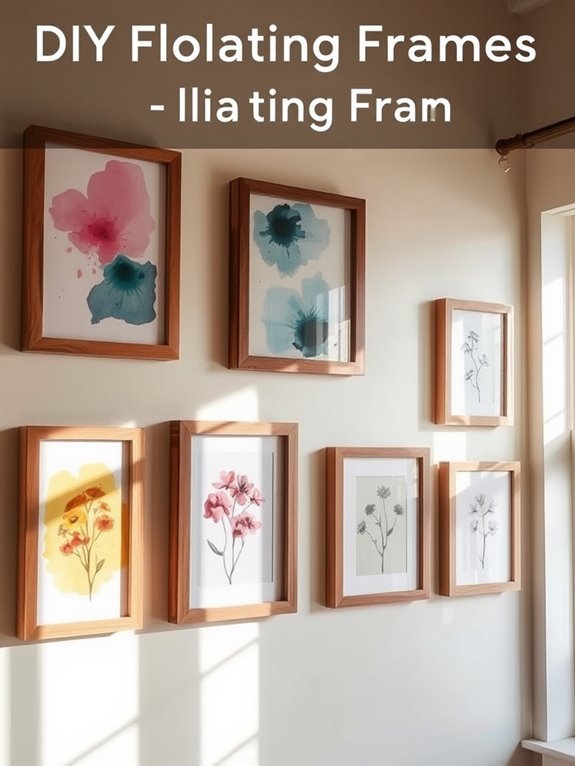
DIY floating frames bring a touch of modern elegance to your home, transforming your favorite artwork into a stunning display.
These frames create the illusion of your art floating, making any blank wall space come alive.
Here's why you'll love this DIY project:
- It's simple to make with just two pieces of glass or acrylic.
- You can customize colors and materials to fit your decor.
- It gives a polished look to any framed piece.
- Floating frames are versatile for various spaces.
- They're easy to hang using adhesive picture hangers or hooks.
With these DIY artwork ideas, you can create a beautiful focal point in your home.
Let your creativity shine, and watch your walls transform!
Budget-Friendly Canvas Art Projects
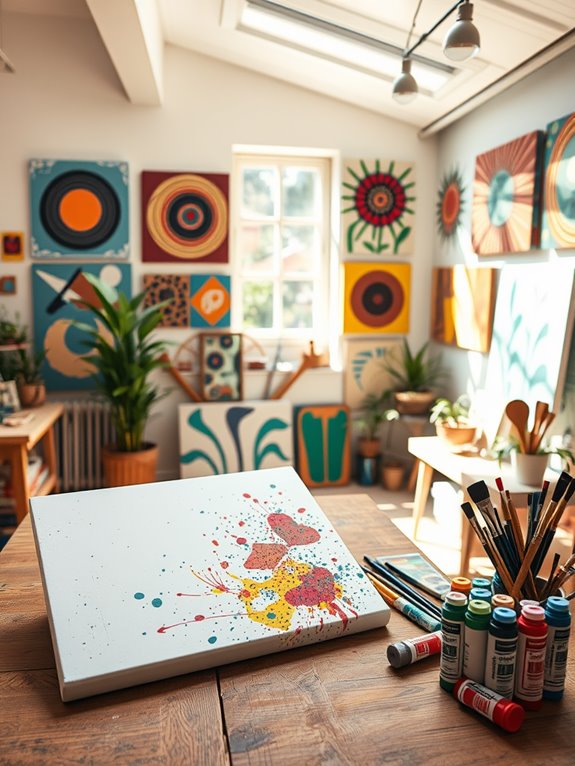
There's something truly special about filling your home with art that you've created yourself, and budget-friendly canvas art projects can make that dream a reality.
With just a few supplies like blank canvases, acrylic paint, and basic brushes—often found at craft stores or thrift stores—you can plunge into the world of DIY.
Techniques like using painter's tape for clean lines or splatter painting can bring your vision to life without needing advanced skills.
Why not try using old bed sheets as canvas alternatives? They can create stunning large-scale pieces!
Plus, free online resources can spark your creativity, helping you design unique decor projects.
Creative Wall Art With Thrifted Materials
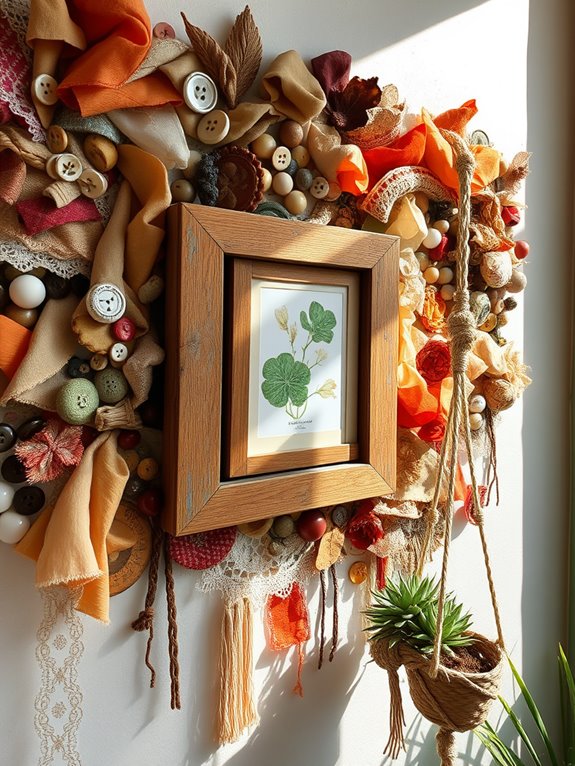
When you step into a thrift store, you often feel like a treasure hunter, don't you? Each aisle hides potential for unique wall art that can brighten your space.
Here are some ideas to spark your creativity:
- Transform vintage frames into a DIY canvas masterpiece.
- Upcycle old mirrors into stunning wall hangings.
- Create botanical art using salvaged windows.
- Use thrifted fabric scraps for textured wall hangings.
- Try decoupage with old books or paper ephemera.
Each piece tells a story, adding character to your home.
I love mixing styles and reflecting my personality through these projects. So, grab some thrifted materials and let your imagination run wild. You'll be amazed at what you can create!
Personalized Artwork Using Printable Designs
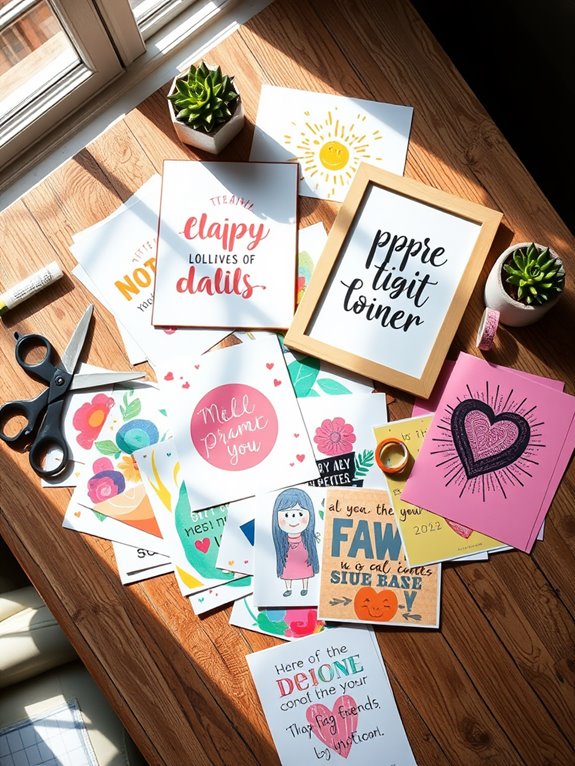
After exploring the wonders of thrifted materials, let's turn our attention to another exciting way to personalize your living space: printable designs.
With so many free online resources, including art museums and platforms like Wikimedia Commons, you can easily find stunning printable art. Imagine framing free printable quotes or vibrant illustrations to add character to your modern wall!
Plus, tools like Canva make it simple to create your own designs, even if you're a beginner. Many printables come in high-resolution formats, so your artwork will look professional, no matter the size.
Personalizing your space with these designs allows for quick seasonal updates, making it fun to refresh your decor whenever inspiration strikes. Why not give it a try?
Frequently Asked Questions
How to Make a Simple Wall Art?
Making simple wall art is so much fun! I love starting with a blank canvas and some acrylic paints. You can create an abstract design using just a few brush strokes and colors that match your vibe.
Have you tried using painter's tape? It makes clean lines super easy!
Or, how about pressing fresh flowers for a unique touch? Whatever you choose, let your creativity shine—it's all about enjoying the process!
Where Do I Start With Wall Art?
Starting with wall art is like opening a door to endless creativity!
I gather my materials—blank canvas, paints, and brushes—often from thrift stores. I immerse myself in simple techniques, like abstract designs, to release my imagination.
Printable templates online inspire me, transforming my ideas into reality. Most importantly, I remind myself that it's about enjoying the process, not just the final piece.
How to Decorate a Wall With a Low Budget?
If you're looking to decorate a wall on a low budget, I've got some great ideas!
Thrift store frames can transform your space for just a couple of dollars. I love exploring free online art prints too—there's so much variety!
Have you tried using natural elements, like pressed flowers? They add a personal touch!
And don't forget painter's tape for fun geometric designs. It's amazing how little you need to create a big impact!
How to Get Inexpensive Wall Art?
Finding inexpensive wall art can feel like a treasure hunt, right?
But guess what? Thrift stores are goldmines for unique pieces, often under $2! I've discovered beautiful frames and quirky prints that add character.
Also, don't overlook online resources—free art prints are just a click away!
You can even create something special using materials you have at home.
Why not transform your space creatively and affordably?
Let's make those walls come alive!
Conclusion
With these beginner-friendly DIY wall art ideas, you can transform your space into a reflection of your style and creativity. Isn't it amazing how a simple piece of art can breathe life into your walls? So grab those supplies, release your imagination, and let your personality shine through your creations. Remember, every masterpiece starts with a single stroke—why not make yours today? Your walls are waiting to tell your story, so let's get crafting!